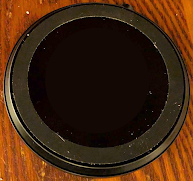
My last post explained why I like my self-heating mug so much, but it ended with a well-deserved kvetch: The entire mug becomes useless when a pin on the charging coaster gets stuck. If you Google charging coaster pin, you'll see complaints from all over the Internet about various brands that all have the same problem:¹
One of the pins gets stuck, and no amount of prodding, poking, beseeching, or percussive maintenance will cajole it back into place.
I fixed it, and you can, too!
Well, fixed in the sense of made it work again, even though I didn't figure out the magic that would spring the pin back into place. I'm happy to use it for as long as it works, especially now that I have a genuine replacement. Here's what I did:
Open the coaster.
With no obvious way to open the coaster, I assumed there must be screws hidden beneath the rubber gasket at the bottom. My daughter noticed a set of Buckyballs (those tiny magnetic spheres that will kill you if you eat 2 of them) on the kitchen table.² She held a string of them over the gasket and slowly traced along it. Most of the time it pulled toward the middle of the coaster, but there were 3 points where the end wanted to hover over the gasket. Screws?
I used a fingernail to gently pry up the gasket, which was held on with a rubbery glue. About halfway around, after I'd already found one screw, I realized a heat gun would make the job easier: you can see how much cleaner the lower left part is than the upper right.
Interestingly, the gasket had been glued to a plastic film beneath it. It covered the screws, so I cut around them with a small knife. They were rather tight, but a good-quality precision screwdriver set made easy work of them.
The next puzzle was figuring out how to separate the two pieces. There was no place to pry them apart. I reluctantly inserted a tiny Phillips screwdriver through the hole for the power connector, gently pushing the bottom away from the top shell. There was just enough space to fit my smallest flathead screwdriver between the pieces. That let me pry them apart enough to fit my second-smallest screwdriver between them. And that made enough room for a fingernail to start to pop the pieces apart. After several more pops, the shell separated completely.
That explained why the magnets were attracted to the center of the coaster: most of the dead space was filled by a slab of metal! Why was it there? Probably simply to add weight, so the companion to a fancy expensive mug wouldn't feel like the cheap plastic that it is, or maybe to keep the coaster flat while it charges the mug.
Find the pins.
I removed the black cloth tape to expose a tiny printed circuit board that was held by plastic clips on opposite sides. Gently prying them back with a fingernail and lifting the board revealed the pins snugged into a plastic supporter. The close-up of the rightmost image clearly shows the problematic pin.
One last attempt to pick and poke at the pin proved just as unsuccessful as every other time, so the next plan was to build up the gimpy pin to contact the bottom of the mug. This was as easy as cutting a rectangle of aluminum foil, about ½" by 3", and wrapping it around a piece of wire to form a "sleeve" that fit over the damaged pin. I pinched the top so it would fit through the support and the top of the coaster, then trimmed it very slightly shorter than the good pin.

A few minutes later I had it reassembled. I connected the charging cord, set the mug on top, and voilà!
¹You may also discover, as I did, that these are properly called pogo pins because, well, you know.
²Yes, we just happened to have Buckyballs on the table. Don't give me that look; things like that happen around here. Sometimes there's an avocado hanging from the living room ceiling.


No comments:
Post a Comment